| Linux CentOS - Redhat EL Installation on HP Smart Array B110i SATA RAID Controller - HP ML/DL Servers |
|
Provided Download Files: HP Smart Array B110i Drivers (Redhat 6.0, CentOS 6.0), RawWrite & Win32DiskImager This article was written thanks to our recent encounter of a HP DL120 G7 rack mount server equipped with a HP Smart Array B110i SATA Raid controller, needed to be installed with the Linux CentOS 6.0 operating system. The HP Smart Array B110i SATA Raid controller is found on a variety of HP servers, therefore this procedure can be applied to all HP servers equipted with the Smart Array B110i controller. As with all articles, we have included step-by-step instructions of the HP Smart Array B110i SATA Raid controller drivers, including screenshots (from the server’s monitor), files, drivers and utilities that might be needed. The HP SmartArray B110i StoryWhat was supposed to be pretty straight-forward process, turned out to become a 3 hour troubleshooting session to figure out how to install the necessary Smart Array B110i drivers so that our CentOS 6.0 or Redhat Enterprise Linux 6.0 install process, would recognize our RAID volumes and proceed with the installation of the operating system. A quick search on Google revealed that we were not alone – hundreds of people seem to have struggled with the same issue long before we did, however we couldn’t locate an answer that provided full instructions on how to deal with the problem, so, we decided to create one that did! Installation StepsFirst step is to enter the server’s BIOS and ensure to Enable SATA RAID Support. This will essentially enable the controller and allow the setup RAID from within the controller. On the HP DL120G7 this option was under the Advanced Options > Embedded SATA Configuration > Enable SATA RAID Support menu:
Next step is to save and exit the BIOS. While the server restarts, when prompted, press F8 to enter the RAID Controller menu and create the necessary RAID and logical volumes. We created two logical drives in a RAID 0 configuration 9.3GB & 1.8TB capacity:
Next, it was time to prepare the necessary driver disk so that the operating system can ‘see’ the raid controller and drives created. For this process, two things are needed:
Selecting the Correct Disk DriverHP offers drivers for the B110i controller for a variety of operating systems, including Redhat and SUSE, both for Intel and AMD based CPU systems. The driver diskette image provides the binary driver modules pre-built for Linux, which enables the HP Smart Array B110i SATA RAID Controller. CentOS users can make use of the Redhat drivers without hesitation. For this article we are providing as a direct download, drivers for RedHat Enterprise Linux & CentOS v6.0 for Intel and AMD 64bit processors (x86-64bit). These files are available at our Linux download section. If a diskette driver for earlier or later systems is required, we advise to visit HP’s website and search for the term “Driver Diskette for HP Smart Array B110i” which will produce a good amount of results for all operating systems. Driver diskette file names have the format “hpahcisr-1.2.6-11.rhel6u0.x86_64.dd.gz” where rhel represents the operating system (RedHat Enterprise Linux), 6u0 stands for update 0 (version 6, update 0 = 6.0) and x86_64 for the system architecture covering x86 platforms (Intel & AMD). Writing Image to Floppy Disk or USB FlashThe driver diskette must be uncompressed using a utility such as 7zip (freely available). Uncompressing the file reveals the file dd.img . This is the driver disk image that needs to be written to a floppy disk drive or USB flash. Linux users can use the following command to create their driver diskette. Keep in mind to substitute /dev/sdb to reflect your usb or floppy drive: # dd if=hpahcisr-1.2.6-11.rhel6u0.x86_64.dd.gz of=/dev/sdb
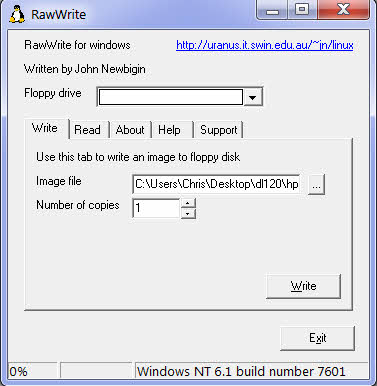
Windows users can use RawWrite if they wish to write it to a floppy disk drive or Win32DiskImager to write it to a USB Flash. Both utilities are provided with our disk driver download. Since we had a USB floppy disk drive in hand, we selected RawWrite:
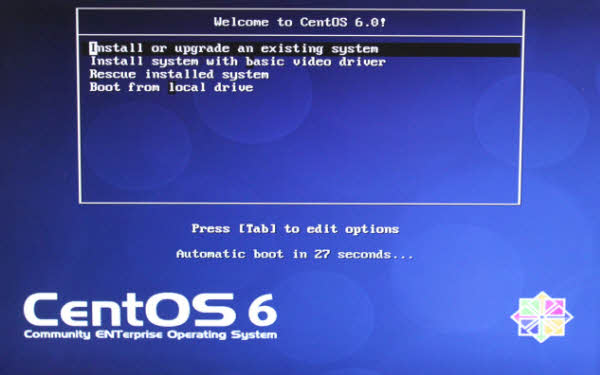
Loading the Driver DisketteWith the driver diskette ready, it’s time to begin the CentOS installation, by booting from the DVD:
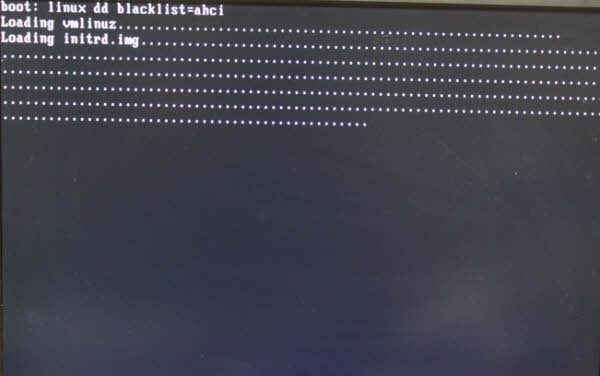
At the installation menu, hit ESC to receive the boot: prompt. At the prompt, enter the following command: linux dd blacklist=ahci and hit enter to being installation as shown below:
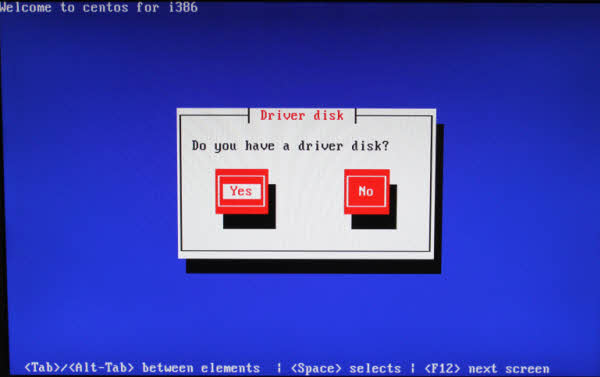
The initial screen of the installation GUI will allow you to load the driver diskette created. At the question, select Yes and hit enter:
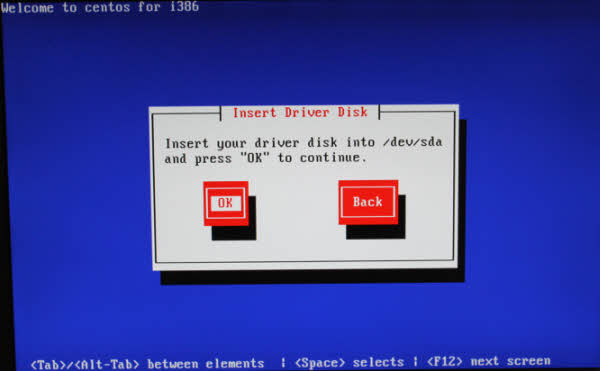
Next screen instructs to insert the driver disk into /dev/sda and press OK. The location /dev/sda refers to our USB Floppy drive, connected to one of our HP server's USB ports during bootup:
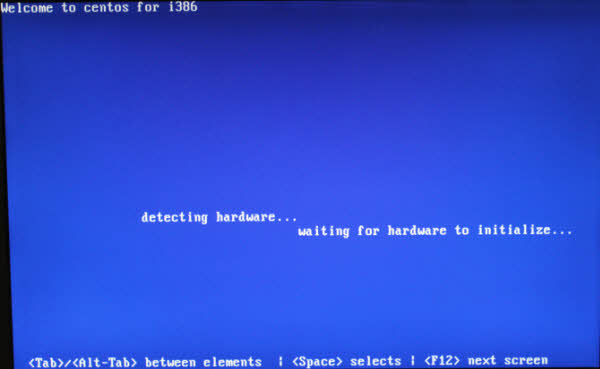
The system will present a screen with the message Reading driver disk, indicating the driver is loading and once complete, the message detecting hardware … waiting for hardware to initialize… will appear:
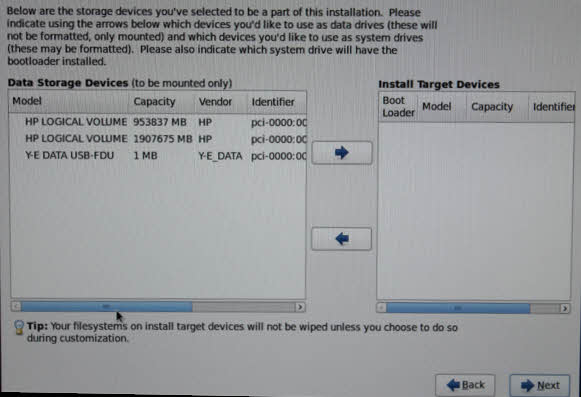
Finally, the installation procedure asks if you wish you load any more driver disks. We answered No and the installation procedure continued as expected. We saw both logical disks and were able to successfully install and use them without any problem:
We hope this brief article will help thousands of engineers around the world save a bit of their valuable time! |
Email any time or call 01480 26 00 00 014 80 26 00 00